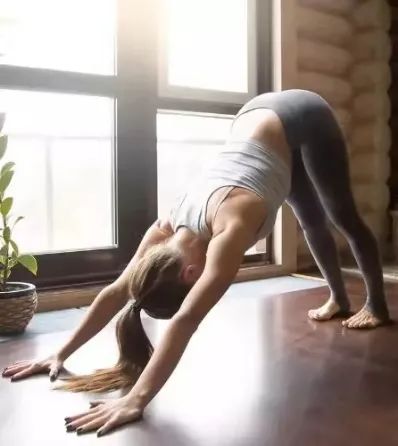
Downward dog pose is one of the earliest yoga postures we learned when practicing yoga.

It is very good at enhancing the overall strength and mobility, and plays a role in neutralizing the spine between strong twisting, forward bending or backward bending.

Once you master the down dog pose, it is a good rest position.

However, in Downward Dog, we usually rotate our shoulders and upper arms inward.

This will sprain the shoulder and neck, causing tension, making the posture more difficult.

In order to make the arm comfortable and stable, you need to perform two opposite movements on the arm.

You may have heard the teacher’s instruction, “Rotate the upper arm from the outside and the lower arm from the inside”, but this may make you confused! So today, share some simple ways to learn arm and shoulder movements.

This will make your down dog pose easier.
Step 1: Open your arms to both sides and sit on your heels.
Turn the palm up to roll the upper arm and shoulder back (the thumb will point behind you).
Pull back the shoulder blades to keep the bottom of the neck free and relaxed.
You may have begun to feel more space and have already felt relaxed on your neck and shoulders.
The second step is to keep the upper arm and shoulder blades in place (roll back/rotate outward), and turn the wrist so that the palm is now facing the ground.
The third step is to maintain this alignment and rotation, and put your arm in front.
Keep the arm bones reinserted into the socket to stabilize the shoulders.
Step 4 Place your hand on the ground in front of your fingers.
Press firmly on the root of the first finger and thumb, especially the fingertip.
When you press your toes down and straighten your legs into the position, the upper arm will keep rotating outward rather than inward, and the shoulders will feel wide.
This can eliminate tension, and you will feel relaxed and spacious on your shoulders.
If you feel your shoulders tight, you can move them forward slightly rather than moving them toward your thighs.
Keep your shoulder blades open and stay here.
Align your neck with your spine, allowing energy to flow freely.
Detailed explanation of posture: kneel on the floor, move the center of gravity forward and hold the floor.
Lift up your feet, lower your body, lean your abdomen against your thighs, extend your arms forward, and fully open your fingers to press the floor.
Inhale, work on your legs, step on the floor and raise your hips.
Exhale, with the heels down, the feet as wide as the hips, the ten toes and fingers fully open and press to the floor, and move the center of gravity onto the feet (if the stretch feeling behind the thighs is very strong, you can take a step forward and then bend the knees slightly).
Shoulders extended, shoulder blades extended and tightened towards the hips.
The neck should be relaxed, the head should sag naturally, the arms should be tightened and rotated inward, the outside of the palms should be pressed downward, and the elbows and eyes should be opposite to each other to prevent hyperextension of the joints.
Remember, in the Down Dog pose, you can bend your knees slightly, which will extend your spine and make your lower back and hamstrings more comfortable…


