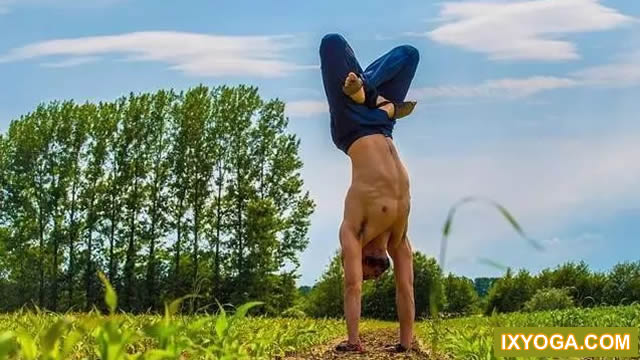
In yoga practice, we often encounter some postures that we can’t complete, and our first reaction is always to find reasons from ourselves, such as thinking that our body is too stiff, or that we don’t master the key points of postures, etc.
However, have you ever thought that you did not complete these postures, perhaps not because of your problem, but because these postures themselves are not suitable for you? 01 You can’t blame yourself for not completing asanas.
There are 84000 asanas in yoga.
However, real yoga practice requires the combination of consciousness, breathing and body, and it is not for these movements.
“Do” and “can’t” in yoga are not the criteria to measure the quality of yoga practice.
As long as you breathe, feel, exert force, stabilize flexible joints, and extend rigid parts in order to achieve the purpose of physical exercise.
“To do” does not necessarily mean to be suitable, and “not to do” does not need to blame and force your body, because everyone’s physique is different and unique.
Do not get hurt because you force yourself, and do not regard yoga as a competitive competition.
In fact, it is not important whether we can achieve postures.
What is important is whether we have gained health, happiness and peace because of yoga practice in this process.
02 The reason why you can’t do asanas is not because you are not soft enough, but because asanas are not suitable for you.
In yoga, no asana is suitable for everyone, and no one can complete all asanas.
It is the tension and pressure between body tissues that limit our range of motion.
Tension, which is the resistance of tissue (muscle, ligament, fascia).
The pressure is generated by contact, including: bone and bone (hard compression), meat and meat (soft compression), bone and meat (medium compression).
Only by understanding the limitations of your body can you better coordinate with your body and avoid confrontation in one person.
1.
Back bending is the upper limit of our range of motion when bones collide with each other or squeeze other tissues in motion.
For example, when the two people in the figure above are doing the back bending posture, the boy on the left cannot extend the spine backward as the girl on the right.
Because of the different structures of the lumbar vertebrae, when they practice back bending, girls can go back a little deeper, while boys quickly reach the limit.
2.
In general, when your knee joint is farthest from your foot and your heel is still on the ground, you need to reach the maximum back bend of your ankle to enter the squat.
For many people, their heels will leave the ground at this time because of the limited back bending ability of the ankle joint.
When you squat to the position shown in Figure D, the requirements for the back flexion range of the ankle joint are small, while the requirements for the hip joint flexion are the largest.
Therefore, if you can’t squat down, or if you squat down, you will fall down.
It is not necessarily an ankle problem, but also related to your hip joint.
03 Yoga practice should also pay attention to taking retreat as a step forward.
Yoga practice should be within the scope of your ability.
If you can’t do it, don’t force your body.
You can choose to practice simple asanas.
As long as you find comfort, stability and safety in simple yoga asanas, you can also reap the benefits of asanas.
Today, Yoga’s editor will introduce you to ten simple versions of basic postures.
I hope you can find more effective and safe ways to practice.
1.
If it is difficult to put your foot at the root of your thigh, or if your body is unstable, you can choose to move your foot downward until the tip of your foot touches the ground.
Remember not to put your foot on your knee, which may cause knee injury.
If it is difficult to keep your balance when your hands are raised above the top of your head, you can put your hands in front of your chest or hold your hips.
2.
If you feel pressure on your lumbar spine during the back bend in Cobra pose, you can try to put a yoga block under the pubis to reduce the back bend and help the chest open better.
3.
Four-post four-post can exercise the strength of the whole body, but for many people, it is difficult to make a standard four-post.
You can choose a simple version of the four pillars on your knees, or put a yoga block under your chest to help you complete the four pillars support.
4.
Triangular Stretching In Triangular Stretching, the hand is placed on the yoga block to extend the arm, which is a relatively common simple version.
You can also directly reduce the range of side bends and put your right hand directly on your right leg.
If you have a much different range of side bends in the triangle, even if you use yoga bricks, you can’t make up for the height.
You can directly reduce the range of side bends and try to practice the triangle against the wall.
5.
You can try to place a yoga block under the hips in the Toe Forward Bend.
This is also a way to lower the level of the left and right sitting posture.
Through this way of practice, you can ensure that the pelvis is upright and the spine is upright, and better complete the posture.
6.
Half-moon pose can lengthen the arm length by placing a yoga block under the lower hand, reduce the difficulty of posture and maintain balance.
In addition, you can also practice against the wall, with your upper hand close to the outside of your thigh and your eyes looking straight ahead.
7.
The standing hand can bend the knee by grasping the big toe, also can use the extension belt, or hold the raised foot against the wall for practice.
In asana, the right hand is held flat on the side of the body, which is more helpful to maintain body balance.
8.
The plough position can be padded with yoga bricks under the foot, and the height of the bricks can be adjusted freely according to the completion of the position until the whole back is perpendicular to the ground.
At the same time, you can also hold your back with both hands to reduce the difficulty of this pose.
9.
For those who have difficulty squatting in the garland pose, you can put yoga bricks under the hips when practicing the garland pose, or you can choose to put something under the heel to reduce the difficulty of this pose.
.

