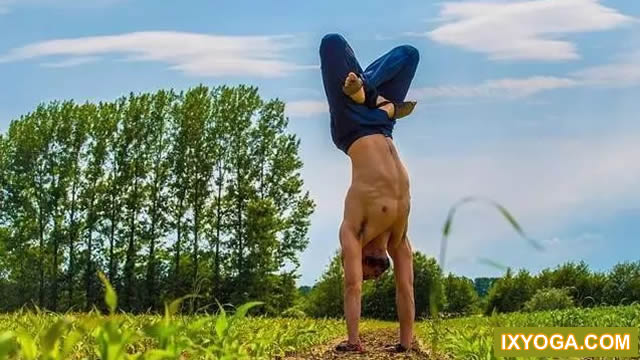
Inverted three-dimensional pose is a very important part of yoga posture.

It can reduce the oppression of gravity on our internal organs for many years, promote the blood to return to the pelvic cavity and bring more nourishment to important abdominal organs.

Inverted asana can also effectively reduce the generation of facial wrinkles.
Blood flowing back to the head can also improve people’s intelligence and responsiveness and delay aging.
It is a good way for Yoga people to “freeze age”.
The key to practicing inverted stereo is to find the right scientific method.
It is dangerous to rashly handstand without any yoga foundation, because you don’t establish the power foundation of handstand and a sense of balance, so you are easy to get hurt.
“I spent five years practicing handstands.
I’m not naturally strong.
I haven’t practiced dance or gymnastics.
It’s all the result of persistence,” said Kino, the goddess of astonga.
The practice steps will be shared with you today.
Through four steps, build strength and balance step by step, so that you can find the feeling of handstand faster.
And finally complete the handstand.
Step 1: stand on your knees in a table style with your shoulders in the center of your hands Retract the navel inward, and retract the lower rib toward the center line.
• Open your shoulder blades and lengthen your tailbone.
Gaze ahead with both hands.
• Then enter the board and put your shoulders over your hands.
• Activate the lower abdominal muscles and tighten the entire torso by activating the core muscles.
• Press your hand into the ground with the strength of your shoulder to open the shoulder bones as much as possible.
• Maintain the weight of your feet, bring your thighs together, and then gently activate your hips.
• Stare at your hands, keep breathing 5 times and repeat 3 times.
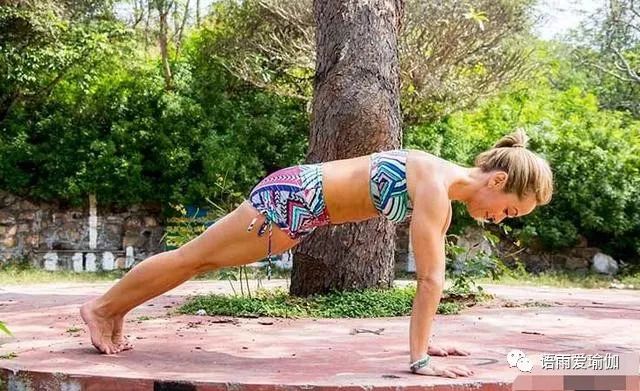
Step 2: floating board floating board is one of the best handstand preparation positions, because it reproduces the feeling of holding up and starting handstand.
• Start with the plank and keep your feet close to your hands while maintaining the stability of your shoulder straps.
• Leave about 4 inches between your hands and feet.
Lengthen the tailbone, retract the ribs, and then tighten the core.
• Move your shoulders forward to align them with the front of your palms, but not beyond your fingertips.
• Maintain the length of the waist and the strength of the torso.
Activate your predecessor and feel the power from below.
• Look at your hands and avoid looking too far forward, or your neck may be uncomfortable.
Keep breathing for 5 times.
Repeat step 3 for 3 times: core • supine.
Inhale as you retract your tailbone and pull down your lower ribs to prepare.
• Exhale as you lift your shoulders off the ground, align your head with your knees, pull your knees into your chest, and then hold your hands on your knees.
• Tighten the lower abdomen while drawing it toward the spine.
• Keep breathing for 5 times, then slowly exit and enter a relaxed lying position for rest.
Repeat 3 times.
Rowing: • start from the position of lying on your back and raising your head.
Retract the tailbone and inhale into the lower ribs.
Prepare to inhale • exhale when pulling the body to the previous folded position.
Inhale as you reach up and keep your shoulders off the ground.
• Place your lower back flat on the ground and extend your legs outward.
Activate quadriceps femoris.
• Keep breathing for 5 times.
When you return, exhale.
Repeat 3 times.
• Then slowly exit and return to the simple recumbent rest step 4: practice the wall L-shaped handstand against the wall to help increase strength along the centerline and train your shoulders to achieve a good handstand • start in downward dog pose, align your feet with the wall and maintain the length of one leg.
• Then, walk your feet towards the wall.
Continue walking until your hips are aligned over your shoulders and your feet are aligned with your hips to form an inverted L • stare at your hands.
Keep breathing for 5 times.
Then walk down the wall with your feet.
Repeat 3 times and finally enter the final pose: handstand.
If you need a little support, find a friend instead of a wall.
Remember to develop a patient and tolerant attitude towards yourself.
• Start in downward dog pose, then lift your left foot and point your toes to the centerline of your body.
Be careful not to exceed the centerline.
• Inhale and tilt your shoulders forward.
Recall the feeling of rowing and let the core force pull you up.
• Keep your right knee close to your chest to avoid leaning too far forward and losing balance.
Look steadily between your hands.
• After maintaining stability, slowly lift the right leg, keep breathing for several times, then exit and change legs for practice.
The most common mistake is to push too hard • trust the strength you develop and lift your body up to the centerline.
• Extend the tailbone up to the heel, then simply up to find a way to enter the first handstand position.
• If you don’t succeed the first time, try 3 to 5 times.
Guruji srik, master of Ashtanga Yoga Pattabhi Jois has a famous saying: “Ashtanga Yoga is 99% practice and 1% theory”.
This sentence has now become the most popular maxim on the head of the Yoga population.
It is a motto to encourage yoga practitioners to practice self-discipline.
Only when you practice can you experience the deepest truth.
No one can practice for you.
In practice, listen to the voice of calm power, say I will stick to it and maintain my faith: no matter how long it takes, no matter good or bad, be tough, focused and patient..


