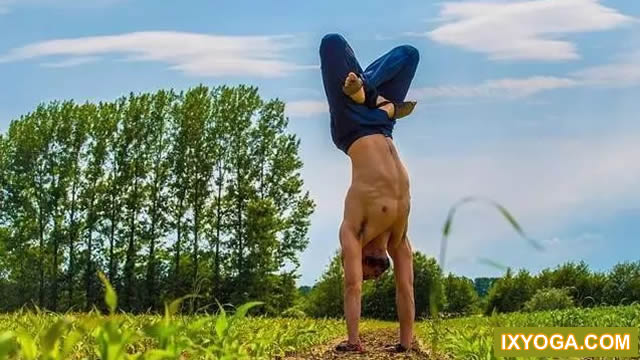
Get nourishment in comfortable postures.

Baby dad is a marathon lover.

At 5:30 a.m.
on weekdays, he will go to the park opposite his home for morning running and go out for long-distance running on weekends.

For a period of time, especially in the early stage of running, the baby’s father was addicted to running volume and speed.
At that time, every time he came back from running, he felt that his whole leg was useless, especially in the tibial area of his lower leg, which was as stiff as a stone.
Several times, I followed him by bike to observe his running method, and then gave him some yoga practice and taught him the correct running breathing method.

After a period of practice, the baby’s father’s running heart rate decreased significantly, and he could easily run half a horse or even the whole horse.
Most importantly, after running a long distance, the stiffness and soreness of his lower leg and tibia were obviously relieved.

We have a group of runners who love marathon.
In the process of daily communication, we often encounter problems such as knee injury and calf pain caused by long-term wrong posture.
Why did this happen? The main reason is that the wrong bearing point and force generating point are used.
In most cases, friends without professional training habitually use the knee joint as the bearing point not only for running, but also for daily standing and walking.
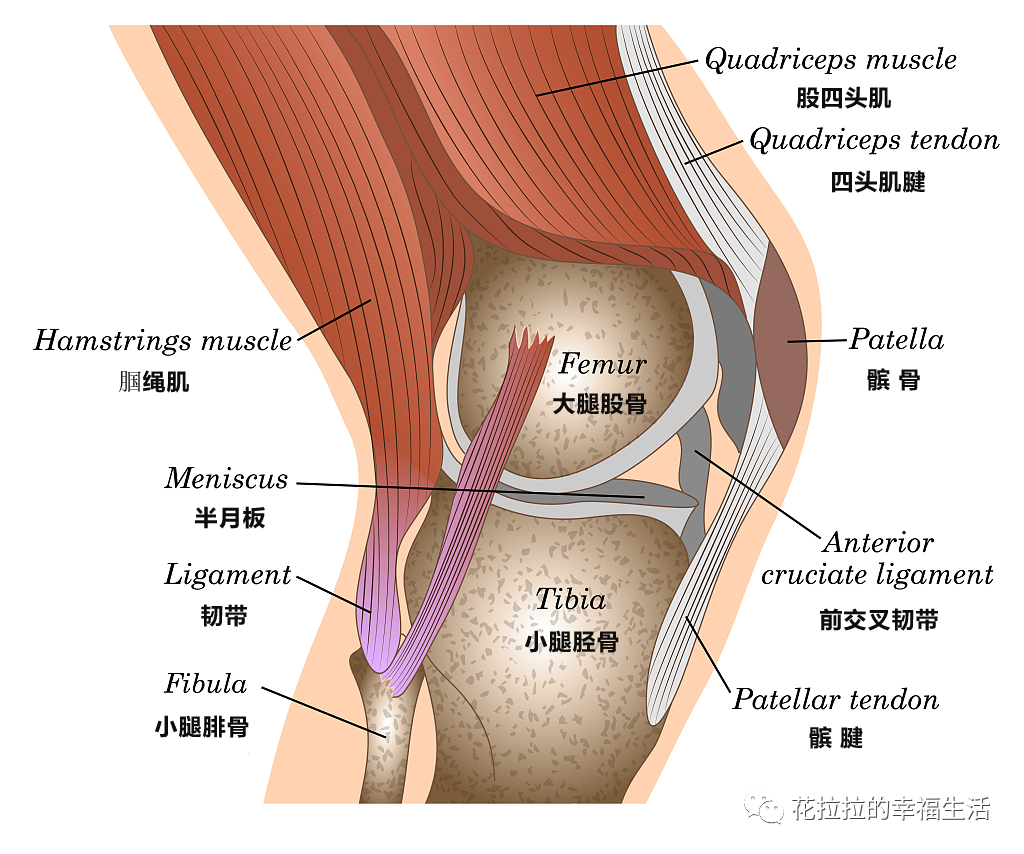
However, the role of the knee joint is not to bear weight, but to connect the thigh, femur and shin.
(organization chart of knee joint) the correct force point should be to start the strength of thigh muscles to drive the whole leg to move.
The place to bear our body weight is the pelvis area, rather than the knee and the bone structure of lower leg tibia below the knee.
The reason why we habitually use the knee joint and the lower leg tibia to bear and exert force is that the muscles in our pelvis and thigh area are extremely weak, lazy and unaware, and we can’t mobilize these two muscles to undertake the work they should have undertaken, so we use the wrong and seemingly easy way to compensate.
Muscle joint bone relationship to figure out how to use the body correctly, we need to understand the relationship between muscle, joint and bone.
Bones, which build the structure of the body, need joints to link between bones, while muscles are the protective layer wrapped in the outer layer of bones and joints to stabilize and protect the whole body.
Legs are the body area we use most every day.
We need to use both legs whether running, standing or walking.
It is particularly important to use some very simple, easy exercises that can protect leg bones and joints.
Today, I would like to share with you four poses that are very suitable for daily home practice.
As long as you spend 5 minutes a day for a period of time, your thigh muscle strength will be significantly improved.
At the same time, you will feel the comfort that your bones and knees are gently wrapped by muscles.
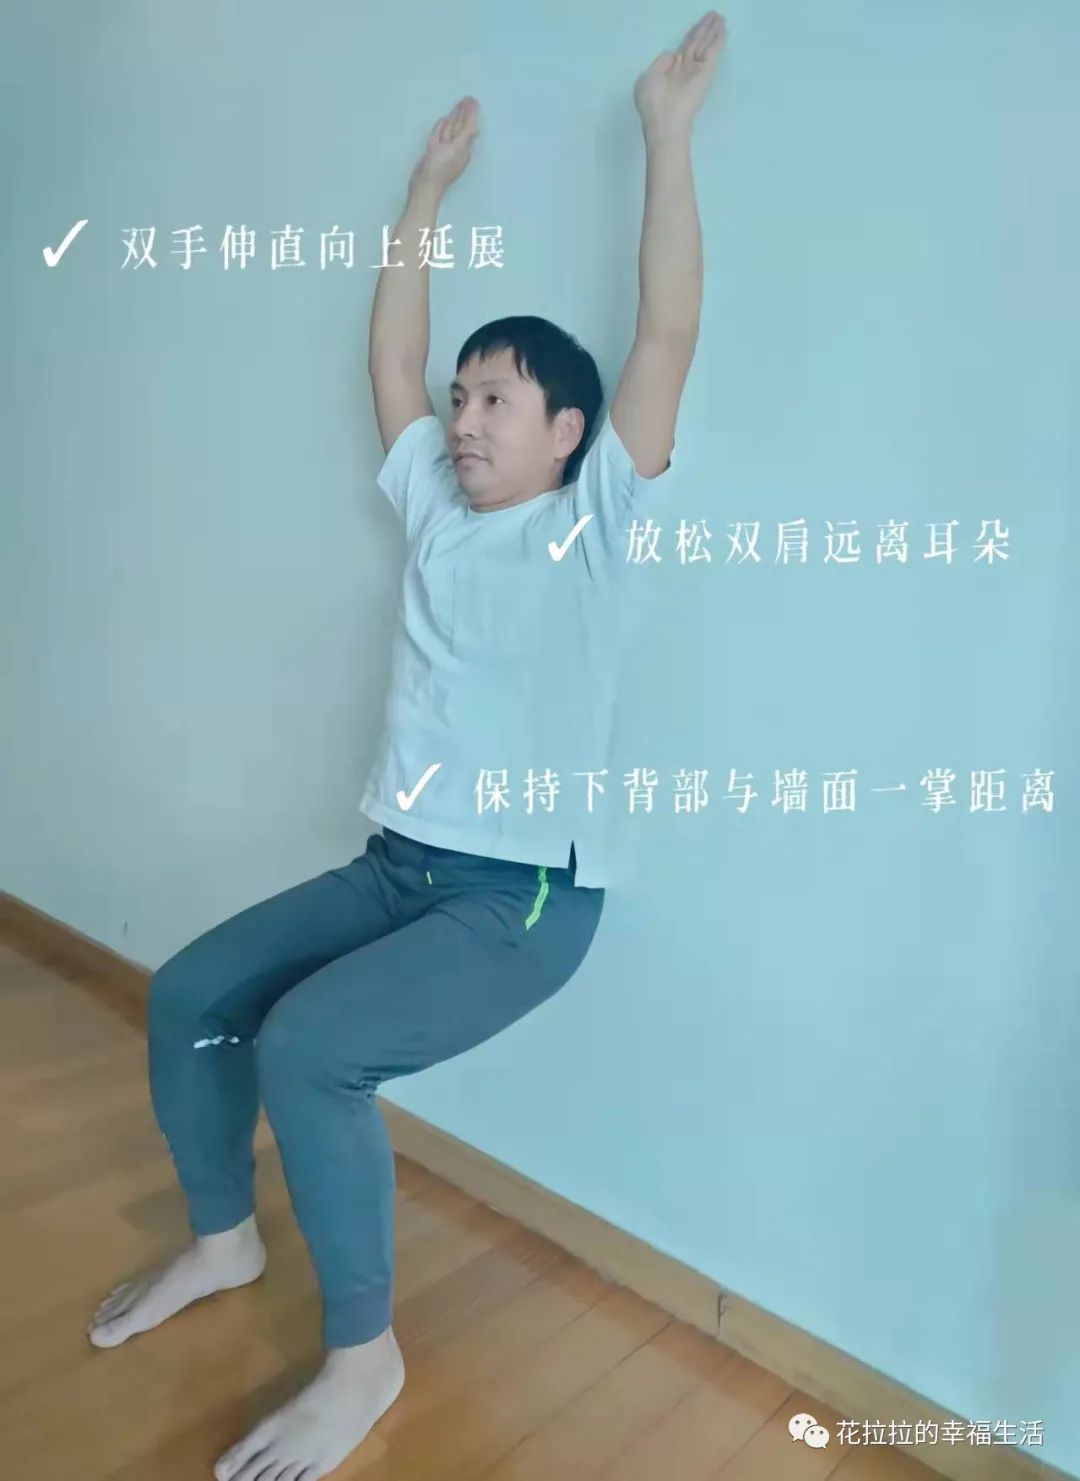
Asana 1: for beginners of mountain standing against the wall, it is recommended to stand against the wall to help them get the correct direction of bones and muscles.
Benefits of practice: √ improve standing posture √ strengthen thigh, knee and ankle strength √ relieve sciatica √ reduce flat foot instructions: ① stand against the wall, heel against the wall, big foot ball bone contact, heel differentiation, toes and knees facing forward; ② The skin of the soles of both feet shall be in full contact with the ground (if the muscles outside the lower leg are often sore after running, the inner edge of the soles shall be stepped down more consciously); ③ Roll the tail down, retract the ribs, and keep the distance between the back and the wall at one palm; ④ Stick the back of your head to the wall, look straight ahead, breathe naturally, and keep it for 1-2 minutes; For the specific course, click “standing mountain pose, the foundation of cultivating correct posture” for details.
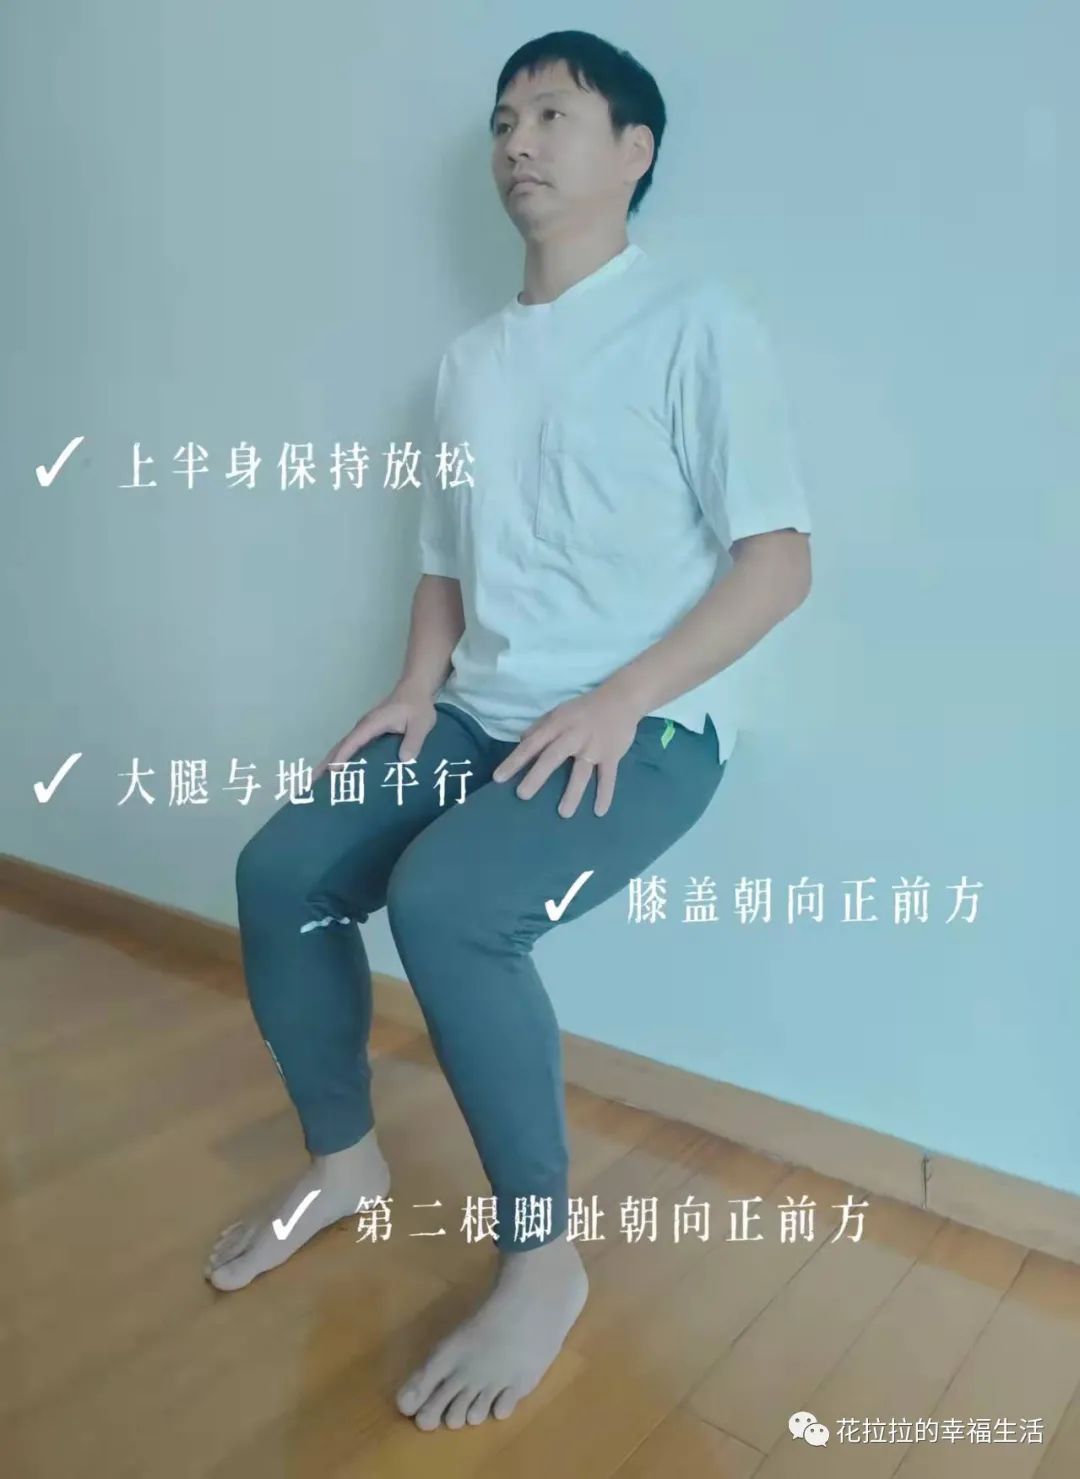
Asana 2: for beginners of magic chair against the wall, it is recommended to practice against the wall to help avoid excessive load-bearing pressure on the knee joint caused by insufficient thigh strength.
Benefits of exercise: √ strengthen the strength of hips, thighs, knees, lower legs and ankles √ establish the correct way to force the legs.
Instructions: ① stand at a distance of about two feet from the wall; ② Open your legs the same width as your sitting bones, with your second toe facing straight ahead; ③ After standing, bend your knees so that your thighs are parallel to the ground.
At the same time, your upper body and hips are against the wall, and your knees are facing straight ahead; ④ Put your hands on your thighs naturally, keep 10 groups of natural breathing, and then stand slowly and return to the original posture.
Variant: you can lift your hands over your head with the palm facing outward and your arms close to the wall.
This variant can stretch the spine and axillary lymph glands and help relieve the tension of shoulders and neck.
It is worth noting that after squatting, both knees cannot exceed the second toe.
If the knee exceeds the toe, the knee will be damaged due to hyperextension.
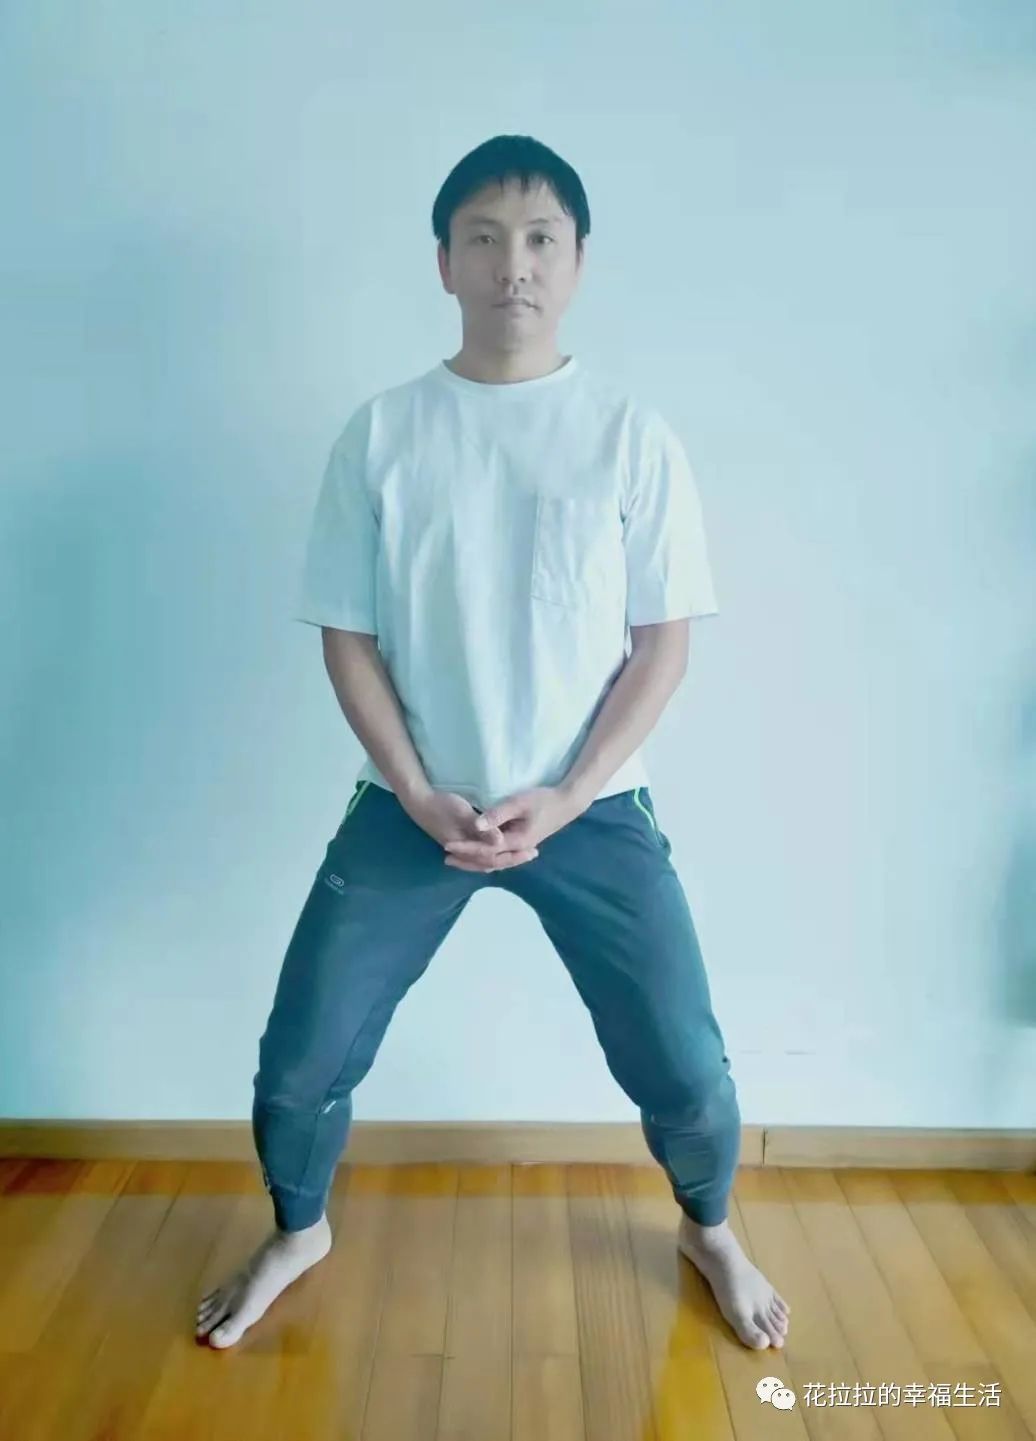
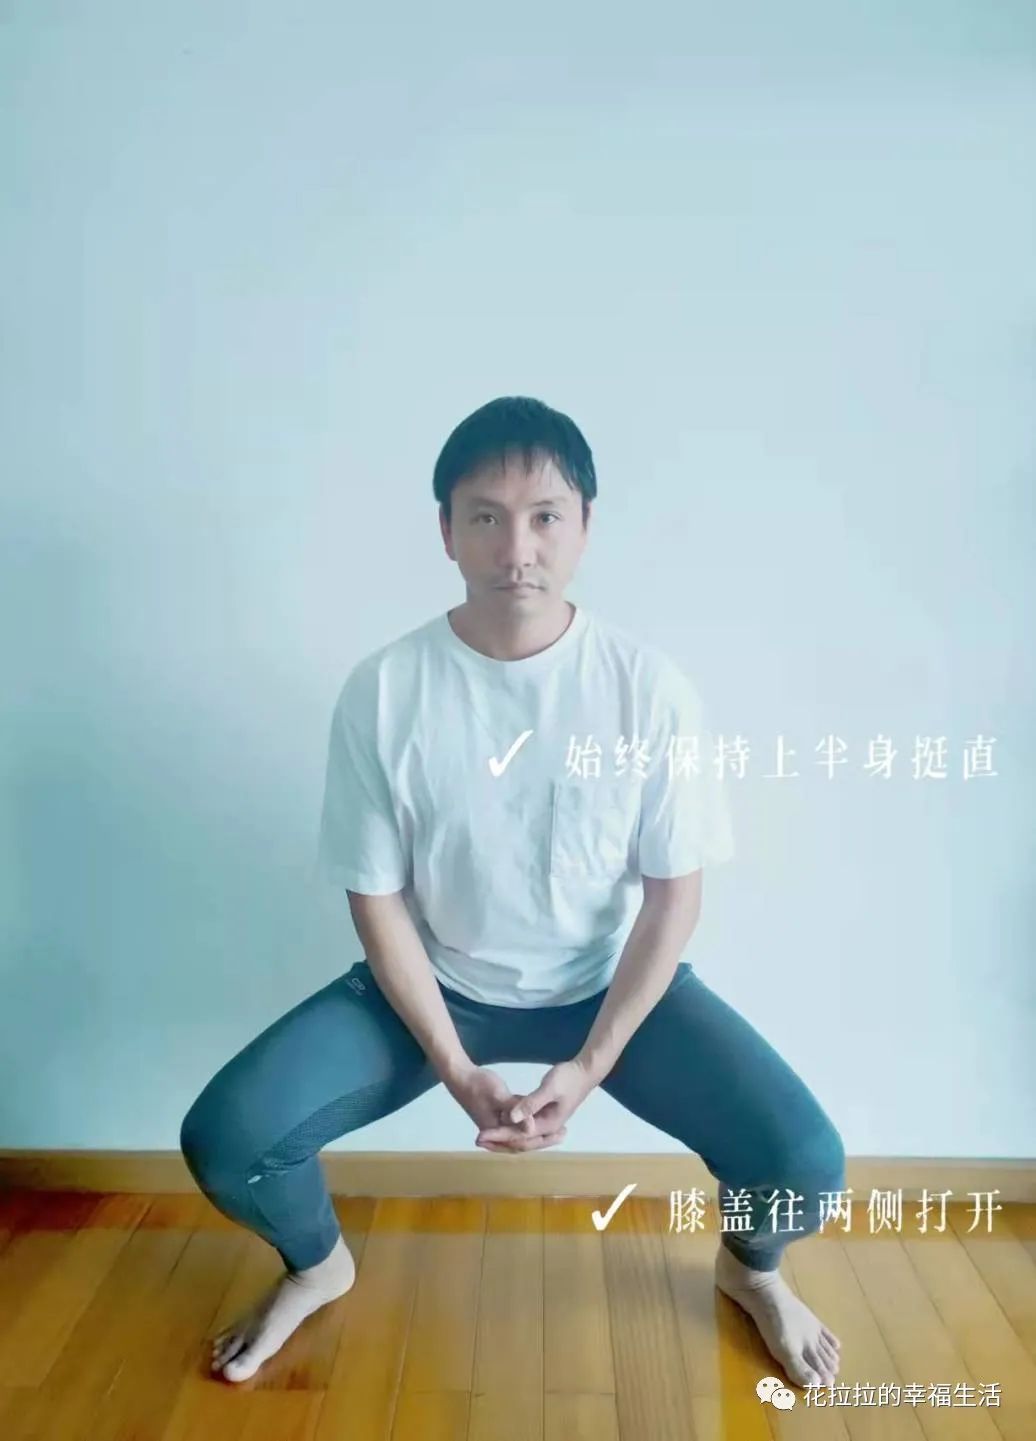
Benefits of three-stage squat exercise: √ strengthen the muscle strength of the inner thighs √ strengthen the muscle strength of both knees and ankles: ① open the legs naturally to a comfortable and stable distance, with the toes facing outward; ② Cross your hands and put them in front of your body naturally; ③ Inhale, extend the spine upward, exhale, bend the knees, slowly lower the body down a little, maintain 5 breaths, and restore the standing three-dimensional posture.
After several groups of natural breathing adjustment; ④ Exhale, bend your knees again, lower your body slightly lower than the first time, maintain 5 breaths, and then resume standing three-dimensional posture again, and several groups of natural breathing adjustment; ⑤ Exhale, bend your knees again, lower your body to two thighs parallel to the ground, maintain the posture of standing up after 5 breaths, and relax; ⑥ The above ③ – ⑤ are a group.
Repeat the same exercises in groups 6-12.
1-2345 it should be noted that the lower you squat, the easier it is to push your waist and hips.
Always keep your upper body straight, your thighs actively exert force, and the soles of your feet step on the ground to avoid pushing your waist and hips..