The so-called butterfly bones are two shoulder blades symmetrically distributed on both sides of the back below the shoulder.
Many female stars will practice hard to wear butterfly bones before attending large-scale events.
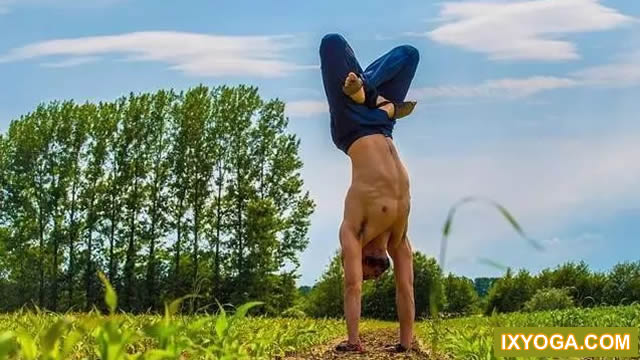
It’s not difficult to have butterfly bones – taking some time to do back exercises every day can not only make the back lines firm again, but also reduce pressure on the way.
The following actions can be done once in the left and right directions, and repeated 3-5 times.
Yoga practice step by step, according to their ability to bear, there is no strict time, but it is best to practice at a fixed time every day.
In the process of practice, if you really can’t do some actions, don’t force it.
As long as you stretch your body, you can produce the effect of practice.
1.
Warrior three pose (1) stand on the yoga mat with feet together.
Move the center of gravity to the left leg, and then lift the right leg back; (2) Lean forward to be parallel to the ground and keep your balance, and extend your arms parallel and straight forward; (3) Tighten the lower abdomen, maintain the correct posture and take 3-5 slow deep breaths.
2.
The starting position of side brace (1) is downward dog, with both feet close together to clamp the big female toes.
Draw your right hand to the left to the top of the yoga mat; (2) Turn up 90 ° so that the body faces the right side, the right foot follows the ground, and the right foot bends slightly to help the body maintain balance; (3) Slowly raise your left arm and lift it up.
Maintain correct posture and breathe gently for 5 times.
3.
Plank pose (1) the starting position is downward dog pose, the forearm is slowly lowered and pasted to the ground, the feet are opened, the shoulders are perpendicular to the elbows, and the body is kept in a straight line as far as possible.
(2) Maintain correct posture and breathe gently for 5 times.
4.
Camel pose (1) kneel on the mat with legs shoulder width apart, instep on the ground, and hold the waist with both hands.
(2) Inhale and push your hips forward, your chest back, and your eyes in front.
(3) First, put your left hand on the heel of your left foot and keep your right hand unchanged.
(4) Then put your right hand on the heel of your right foot and keep your chest tilted back and your hips pushed forward.
(5) Slowly lean your head back with natural breathing and stretch your neck.
(6) Keep the movement for 10 ~ 15 breaths, and then you can slowly resume kneeling on the mat, overlapping your hands in front of your chest, and resting your forehead on your hands to relax your body and resume breathing.
5.
Half moon pose (1) complete the triangle pose step by step.
(2) Bend your right knee at a 90 degree angle to the ground.
(3) Turn your eyes to about a foot in front of the tip of your right foot on the ground, put your left hand away and put it on your left pelvis.
Move the right hand to the focus of the front line of sight, then press the ground with the fingertip, and the thumb of the hand is about a foot away from the toe of the foot.
Extend your body slightly forward, shift your weight to your right foot, lift your left heel off the ground, and prepare to lift your left foot.
Stay for about 2 to 3 seconds and keep breathing.
(4) Inhale, open your chest and stretch your spine.
Exhale, slowly straighten your right foot and lift your left foot off the ground.
Take the right foot after stepping straight as the balance point.
Straighten and lift the left foot parallel to the ground, move the knee and toe forward, and move the left pelvis and left shoulder back; On the contrary, move the right pelvis and right shoulder forward, so that the chest and abdomen move forward, and the whole body is in a horizontal state.
Finally, stretch your left hand upward and form a vertical line with your shoulder and right hand.
If the balance is properly controlled, turn your head over and look at your left hand.
Breathe deeply and steadily.
Hold this position for about 20 to 30 seconds, then return to step 1 in reverse order, and repeat the above steps with the other foot…