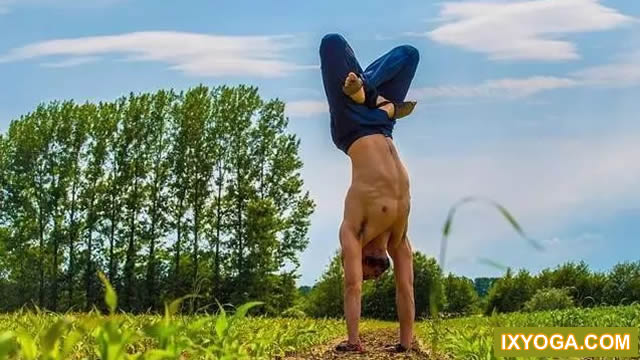
Handstand is one of the best upper body enhancers.
Today, yogi Xiaobian recommends some handstand techniques.
Try for two weeks and you will find yourself satisfied with the new muscle definition, balance and energy.
Handstand is one of the best ways to exercise upper body strength.
Today, yogi Xiaobian recommends several techniques for practicing handstand.
Try it for 2 weeks, and you will find great changes in muscle, balance and energy.
Fixing the outer arm to stabilize the big arm inward is actually the most difficult part.
In handstands, you must learn how to engage and stabilize the shoulder straps.
If you don’t, your wrists and wrists are bearing all the weight – Oh! Please warm up before practicing the next handstand preparation.
This, in fact, is the hardest part.
You should learn to stabilize the shoulder girdle, and then practice handstand.
Otherwise, you will put your weight on your hands and wrists, which is easy to get hurt.
Try this warm-up before handstand.
1.
Take a yoga block and hold it on your head.
Don’t move your arm muscles at all – imagine they’re spaghetti.
Hold for a minute.
Release the block and rest your arm for a minute or two.
1.
Get the Yoga brick and raise it above your head.
Instead of activating the muscles of your arms, imagine that they are two noodles.
Hold for 1 minute.
Release the brick and relax your arms for 2 minutes.
2.
Next, raise your arm over your head again, then push it into the box with both hands, and extend your fingers above with your fingertips.
Straighten your arms, then think about the upper arm muscles close to your ears.
Stay here and push your hands hard into the obstacle for one minute.
2.
Then, raise your hands over your head again, clamp the bricks with your hands, and extend your fingertips upward.
Straighten your arms and imagine your big arms looking inward for your ears.
Hold here and push the brick hard with your hand for 1 minute.
Which version is more difficult? The second, of course.
In the second version, the muscles that feel working are the same as those used in handstands.
Which is more difficult? The second, of course.
The second method of arm exertion is needed in handstand.
Handstand preparation 1 handstand preparation 1 some people find this more challenging than handstand, probably because there is no motivation to help you stand up.
It allows you to step into a pose along the wall and understand how it feels.
Some people find this more difficult than directly jumping up to handstand.
Maybe because this can’t jump with inertia, they need to walk up slowly with their feet to understand the feeling of handstand.
1.
Keep your heels close to the wall and face down to the dog.
You may need to shorten the height of your dog because your shoulders need to be aligned on your wrists when entering it.
Bend your knees and start stepping on the wall; In this way, your shoulders will move forward.
It’ll be fun.
You may also walk too high on your feet – you want to be at a 90 degree angle.
It’s helpful to have someone tell you your height or your height is too low.
Fine tuning: activate your core by tightening your navel; Press the outer arm close to the ear, just like the square above the head.
1.
Come to downward dog pose with your heels against the wall.
Extend the distance of downward dog pose because it needs to be aligned with the wrist after going up.
Bend and align, and walk slowly up the wall.
Move forward.
Until the feet are at the same height as the tibia and the body is 90 °.
You may need a companion to tell you whether you have reached 90 °.
Right above the core.
Start the core, retract the navel, turn the arms outward to find the ears, just like holding bricks on both hands.
2.
When your core and upper arm are engaged, you can go further; Practice raising one foot while the other foot is firmly fixed to the wall.
When you lift the toes of the other foot, put your hands and feet on the wall.
Hold your breath and change your legs.
2.
Keep the core and arms activated.
You can go further, practice one leg handstand and keep the other foot on the wall.
Keep breathing a few times and change your other leg.
If you tremble and find the first step difficult, breathe there (don’t try to lift your legs!) and slowly lower the child’s position.
Please do a handstand before you are ready to continue.
If you find that your first hand starts shaking, keep it first.
Then slowly come back to the baby rest.
Handstand Prep2 handstand preparatory action 2 you should not rely on power and kicking to get yourself into position.
This is how to kick a hole in the wall.
If you control takeoff, the power is very small.
Next, try to practice handstand against the wall.
When practicing, don’t use too much inertia.
Here, we don’t need to straighten our legs upward, but let our legs perpendicular to each other to find the feeling of control, rather than using inertia to fall to the wall.
1.
Put your hands slightly over one foot from the wall and enter the downward dog.
Shorten your dog slightly, then lift one leg in the air to become a tripod.
Your lower leg will become the launching leg.
The other foot must remain raised.
Bend the knee of the firing leg and raise the other leg as high as possible.
1.
Come to downward dog pose and keep your hands one foot away from the wall.
Shorten the distance of your downward dog pose, and then raise one leg to the downward dog with one leg.
Bend the lower leg a little, and keep the other leg straight and raised.
2.
Bring your consciousness to the launch pad.
First practice a small jump while keeping your legs raised.
These should feel under control.
Start small and make your hops bigger.
2.
Bring awareness to the bent leg, start stepping on the ground, keep the body up, and keep the raised leg up.
There must be control.
Don’t jump too high at the beginning, step by step.
3.
As the footsteps become louder, the launching leg will be raised, and the raised leg may touch the wall slightly.
If you are in control, you can “jump” and linger in your hops for a second or two.
This comes from using your core.
3.
When you jump higher and higher, the lower leg will rise, and the upper leg will slightly touch the wall.
If you have control, you will have a moment of stability in control, which requires core strength.
This can help you negotiate space and make a mind / body connection by controlling how people establish posture.
Practicing this step more will give you a more controlled handstand.
Handstand on the wall.
Handstand on the wall.
You’re here After mastering the previous preparations, you can prepare for full posture on the wall.
After completing the previous preparation, come to the handstand against the wall.
1.
Only your heel touches the wall gently – do not dig it in.
The wall is only a small part of the support.
1.
Just touch the wall gently with your heel.
Don’t put too much weight in it.
Don’t bend back.
2.
The hip or gaze point between your hands.
2.
Look between your hands with your eyes.
3.
Slowly lower down in a controlled way.
First put down the raised leg, and then let the launching leg follow.
Don’t stand up right away.
Keep the downward dog breathing 5 times.
The content of this article comes from the Internet, and the copyright belongs to the original author.
If there is any infringement, please contact and delete it in time.
。.